Showing posts with label How To.... Show all posts

March 16, 2012

How to easily decorate a bedroom

What's better than doing the laundry? actually everything, well... except dishes + ironing Tell you what, painting silly on clothespins and hanging lovely photos over the bed is. It's even better than keeping them in an album (although scrapbooking can be fun) or worse, hidden in a folder.


  • we used wooden clothespins, painted with acrylic, four nails, hammer + thread;
  • tip: use matte photo paper;
  • a super easy, cheap + fun way to change the mood and dodge chores;
  • all in all it was awesome hacking another wall... what's next?

  •  

     Have a beautiful creative weekend!

    February 8, 2012

    Paper lamp shade + butterflies

    Hi, cats.

    I'm in love with the 6th thingy. We used plain paper, a paper lamp shade, scissors and glue. It took about 20 minutes to make everything and about two days to post it, yikes. I guess color paper, maybe red tones + black, would have been cool too. I tried painting a few butterflies but the paper lost its shape so we went back to simple.

    So what do you think, hot or not?
    (It kinda screams Valentine's Day, doesn't it)

    February 6, 2012

    Shoe box for photographs

    I'm posting a little late about the fifth thing, I'm a bit tired cause I've been meowing + mooing + singing all day + all the other thrills when you have a ten week old at home (including starring into each others eyes for hours, like lovers).

    I started working on it yesterday but I finished today: it's a cardboard (shoe) box turned into a pretty box to store memories like photos, notes, etc. How it's made? We torn apart a few fashion magazines in search of the perfect (as if) images, then we crumpled (for a vintage look) and glued it onto the box. Then... um, no, there's nothing more, that's it.

    I hope this has been inspiring and I wish you plan + enjoy a very creative week... but see you a bit later!

    October 11, 2011

    How to make a baby blanket

    Before revealing the surprise project I've been working on, I want to say a few words about the last hectic days.

    So we finally found a home and we already moved some stuff especially my mobile kittn corporation, that's why I was there yesterday working but actually breathing, listening to the silence, enjoying time alone... have I already said breathing?

    Needless to say yesterday passed in a second.

    I felt very calm, comfortable, all in all having again those feelings of something being just right. Not mentioning I was very inspired and motivated to work!

    The apartment is a small studio with a big kitchen that I can somehow separate in two, arranging a work space. It's not completely furnished yet so it will tke a while until everything is into place, but you know what I loved?

    The sun shines there all day, the windows are as big as the walls + the light plays all day letting me enjoy a wonderful sunset at the end of each day, just like the little prince wished.

    And speaking of a little prince, here's the latest invention: a bright colored (I told you I felt happy in the new home) baby blanket that can serve as a cover or as a play mat.


    I calculated that being about 80 x 90 cm it will have 12 (20 x 30 cm) pieces of fabric accordingly so I cut + sewed them together.

    I created the felt animals + hearts separately, then I stitched them onto the fabric. For the other (warm) side of the blanket I chose a very thick fleece piece in bright turquoise.

    I sewed the parts together, then brought them on the right side and finally stitched a line along each side creating a firm margin.


    So this is it, a very cute easy to make baby blanket. If you have any questions or wish to use the same patterns, drop us a line anytime and we'll e-mail you the instructions.

    Kisses + hooray for freedom, joy and new homes!

    August 11, 2011

    How to make a baby girl t-shirt

    Today's post is about creativity.

    Transform, innovate + actually do the whole process, not just have an idea. I hope we lose the fear of making mistakes, let ourselves free and create. Oh, and it's OK if we don't start from scratch (we won't invent the wheel again - darn it - but we will certainly build it better, give it other use or make it nicer, which is equally important).

    So grab a t-shirt (new or older, for you or loved ones), pieces of fabric, scissors, needle, thread + other accessories like pom-poms, buttons, bows, anything will do.


    Cut a heart shape both from the original t-shirt and fabric. Sew the new heart on the t-shirt.


    Draw on another piece of fabric using textile acrylics or markers. It can be anything and the only skills you need are joy + love. Sew over the heart.

    Tadaaa! One of my best friends is expecting the loveliest baby girl so I made this t-shirt for her (there is a whole meaning behind the use of a panda bear). I hope she'll like it...

    ... and I hope you too have an awesome session of creating, I promise you will feel great!

    May 8, 2011

    How to... create rainbows.

    The weather has put my place-a-day adventures on hold for a while, as it rained heavily for the past few days - it stopped now and it's sunny again so I will be on the road again next week.
    The good news is I had some time to experiment with tie dyeing, a technique which in the end proved to be so easy to do and - in the spirit of the late 60s, when it became fashionable in the west -very addictive. :-)
    You need a t-shirt, plastic boxes (one for each color that you use), rubber bands, textile paint.
    I used my usual textile paints which I had to dilute with water so they lost their brightness and became pastels. Powder textile pigments are better for tie dyeing as the color stays intense and make the patterns more spectacular, I will surely use them next time.

    First you have to spray water on the t-shirt to make it easier to roll (yep, in the same 60s spirit). Then you pinch the t-shirt where you want the center of a spiral to be and start to twist it slowly. Once you twist the t-shirt patiently arranging the folds and the margins, you wrap the rubber bands around it to help keep it in a tight shape.

    You sink the roll for app. 2 minutes in the previously diluted paint then let it dry for at least 24 hours (if you work with powder pigments that need preparation not dilution, rinse with water after they're dry and iron them at high temperature).
    You can make different designs by changing the pinch, the twists and the colors. I can't wait to experiment with brighter pigments, but until then here is the rainbow... after rain:

    PS. Accessorize with a big flower brooch and a carefree attitude!

    October 21, 2010

    Working and playing (How To).

    It's 1 a.m. and I got home. I've been working a part-time job for a month now in a supermarket at the bread and cafeteria department. Yep, I bake and arrange cakes, I carry trays and buckets, I make and serve coffee, cut and pack bread, wash and clean the place and many more. It's not as poetic as it may look, as it all has to be standard and technical. I'm working a lot and during these four hours every day I barely find the time to have a glass of water.
    I don't wanna cry much though, it's one of those things that I need to do for now, a part of the plan to follow my dreams. I pay attention to people and games they play (as always), I discover, I learn and I am proud of myself that I can get the best out of any experience. A friend of mine said the other day it's a fine line between getting better and getting bitter. Well, I choose the first option and it takes a lot of strength to be able to do that as I need to go on with my head up.
    I was saying in the previous post that I need more time daily. Often, I feel that the only things that keep me straight are just a dream, an image or having tea with him on the sofa when we meet at night. I am not alone, I have a wonderful partner who, by the way, works hard too. Being together makes more sense, we clearly look to the future and believe, we enjoy the present even if it's mostly very tiring (when he says he's my blanket so I'll never be cold, I'm ready start the day all over again).
    But getting back to tonight, it's already 3 a.m. and I finally finished the How To post. So here goes, enjoy and try to have as much fun as you can, no matter what.
    You will need a blank t-shirt (be it new or older, colored or not), pencil, scissors, pieces of fabric (as different as they are), small pieces of thicker fabric, pins, needle & string, a favorite image to repeat (in my case giraffes, surprise, surprise).

    Draw the contour of your drawing on each piece of fabric. You can draw different sizes on the different pieces. Patiently cut along the lines (don't worry if the margins are not perfect, perfect is so yesterday's news). Cut as many figures as you want and start arranging them as a composition on the t-shirt.

    Carefully pin the pieces on the t-shirt...

    ... and cut the eyes (or other elements needed) off the thicker fabric. I used felt, but you can always work with leather, eco-leather, oilcloth. Pin them over the figures and begin sewing on the edges. You don't have to be an expert, I think it looks good with any kind of stitch. You can always add bows, lace, or any other personal touches to make your creation unique...

    ... and remember to have fun!

    One day, I will make things differently. Today is the day.

    September 14, 2010

    How to... have a fresh t-shirt

    Hi! Today I am going to tell you how to wear your autumn. You will need the following: t-shirt or blouse, a few plants or leaves that you like (and you can find on the ground), textile paint, medium brush, water, tissues, blank papers (not newspapers). Let's begin...

    ... with very important work cautions: you might want to thoroughly organize everything, so that you avoid unwanted paint spots all over the place including the t-shirt. Don't forget to place paper inside the t-shirt so the back doesn't get printed too. Choose the plants.

    Take one, put it on a piece of paper, start applying paint with the brush, then place it on the t-shirt. Cover the painted plant with another piece of paper and press lightly. Remove the paper and the plant. Wash the brush and repeat as many times you want, changing the plants and colors.

    Correct the design by adding color drops with a fine brush - I used golden tint for the final touch.
    Here it is:

    Have lots of fun creating your own :-)

    July 10, 2010

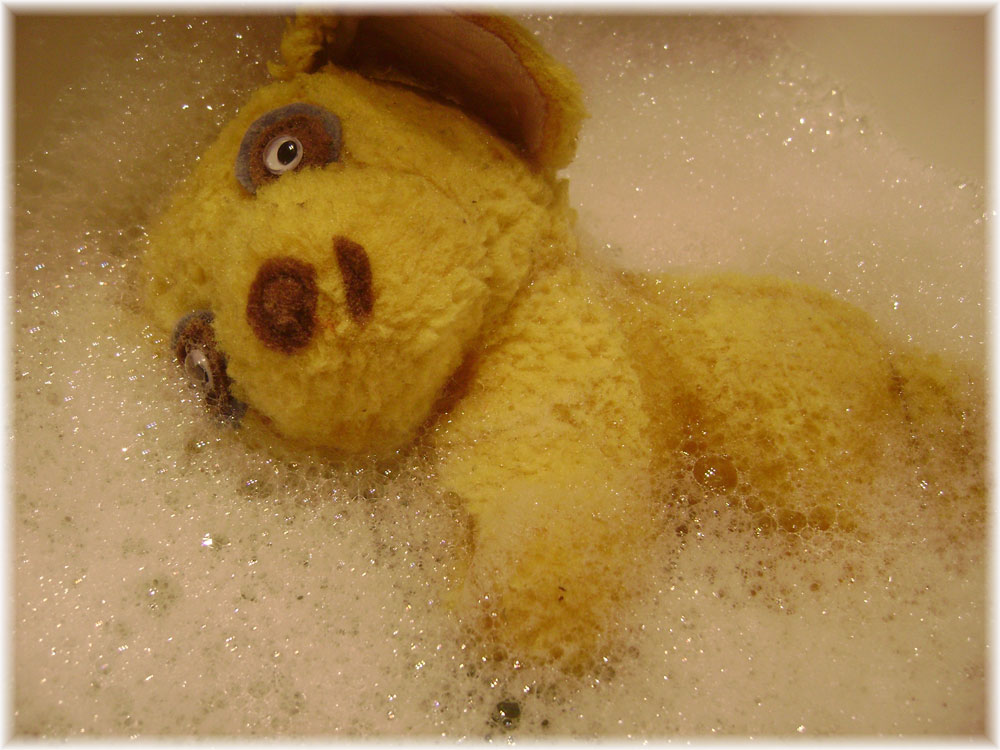
    Hi, I'm just a yellow dog...


    ... and I've been through some rough times in my life. I did what I had to do, I didn't know any better. I've been trying to make it, but I just live on the streets now. This girl saw me yesterday, took me and placed me on a bench - she thought a kid would take me home. Then an older man came by and just kicked me with a walking stick, well, he also didn't know any better.

    This girl I was telling you about looked behind and saw everything, so she came back and carried me in her bag for a while. Then, we got to her house and she prepared her nursing kit: she took good care of my wounds...

    ... I enjoyed a sweet bubble bath and had a good night sleep, finally.

    I opened my eyes in the morning and saw a wonderful world. I don't know what my future will be like, but for now I know for sure miracles do happen...

    ... all it takes is a little love.

    February 11, 2010

    How to... get organized.


    Losing your stuff? Never finding your favourite accessory? Keeping jewlery allover the place? As my answer was yes to all of these questions I decided to have a jewlery box (yay!) so today I'm sharing the making with you. You might get some ideas of how to spend a few relaxing hours on your evening...

    First step: find your recipient. I chose a wooden box (which smells like the forest).

    I painted it with acryl color (french blue tone), found my favourite images to tear from a magazine (Vogue, ahem) and glued them over the paint.

    Then, you might want to apply the varnish with windows open or else you will have a laughter attack like me. :-)

    I placed the jewlery inside the box (still laughing) ...

    ... and now I cannot take my eyes off of it.

    Have fun creating your own!

    August 18, 2009

    DIY: Curtains.

    I am not such a big fan of curtains, but I have always dreamed of having colored light in the room, changing throughout the day. Not finding the exact ready-made curtains in the store, I decided to make them myself and if you have two hours and the will to design your home, you can do it yourself too. So here goes...

    Find the fabric you want and measure it correctly. I chose red, green and beige for a very soft fabric that can hang loose. Of course, you can create it in how many colors and pieces you wish :)

    Cut a few pieces which will be the hangers. Fold each in half, sew then bring on the right side and close with a stitch. This will hide the raw edges.

    I chose a strong stitch to give the edge a nice finish. I sewed along the edges of the fabric, then I got rid of the loose threads by cutting them out.

    I added the hangers...

    ... and simply turned them into bows. Cute, huh? Then I continued with the other pieces of fabric...

    ... and hanged them as well by making knots...

    ... and now I have my colored ever changing light!
    Like it... or love it? :)